
Crunchy Reuben Pickle Bites for Every Occasion: Quick Recipe

Crunchy Reuben Pickle Bites for Every Occasion are a vibrant twist on a classic sandwich, offering a delightful explosion of flavors wrapped in the inviting crunch of tangy pickles. Imagine hosting a party and watching your friends clamor for more of these zesty bites that bridge the gap between appetizers and finger foods with style. These playful snacks aren’t just delicious; they evoke memories of gatherings filled with laughter and playful banter. Whether it’s game night or a cozy get-together, Crunchy Reuben Pickle Bites for Every Occasion are guaranteed to steal the show—and your heart. Ingredients for Crunchy Reuben Pickle Bites for Every Occasion Here’s what you’ll need to make this delicious Crunchy Reuben Pickle Bites for Every Occasion: 2 Tbsp. mayonnaise – Adds creaminess and binds the ingredients together for a delightful dipping experience. 2 Tbsp. low-sugar ketchup – Offers a touch of sweetness and tang, perfect for balancing flavors without overwhelming the palate. 1 Tbsp. sweet pickle relish – Bring on the crunch! This relish adds texture and bursts of flavor with every bite. 3/4 tsp. prepared horseradish – A punch of heat that amps up the flavor profile, making your bites exciting. 1/2 tsp. fresh lemon juice – Brightens the overall flavor and keeps everything fresh and zingy. 1/4 tsp. Worcestershire sauce – Adds depth and savory notes, taking your bites to another level. Kosher salt (to taste) – Enhances all the flavors, ensuring nothing is bland or flat. Freshly ground black pepper (to taste) – A little seasoning goes a long way in bringing all these rich flavors together. 2 cups pickle chips (drained) – The star of the show, these provide the perfect crunch and tanginess. 4 oz. thinly sliced corned beef – Offers hearty, meaty goodness, reminiscent of the classic Reuben sandwich. 3 oz. thinly sliced Swiss cheese – Melts beautifully and adds a creamy flavor that pairs wonderfully with the other ingredients. 1/4 cup sauerkraut – Adds an extra punch of tang and crunch, true to the Reuben tradition. How to Make Crunchy Reuben Pickle Bites for Every Occasion Follow these simple steps to prepare this delicious Crunchy Reuben Pickle Bites for Every Occasion: Step 1: Prepare Your Flavored Cream In a bowl, combine mayonnaise, low-sugar ketchup, sweet pickle relish, prepared horseradish, fresh lemon juice, Worcestershire sauce, kosher salt, and freshly ground black pepper. Mix well until smooth and creamy; this will be the flavorful sauce that ties everything together. Step 2: Layer the Pickle Chips On a serving platter, arrange the drained pickle chips in a single layer. Make sure they’re nice and straight for an eye-catching presentation. Trust me, the neatness will impress your guests. Step 3: Add the Corned Beef and Cheese Next, layer the thinly sliced corned beef evenly over the pickle chips. Follow with a layer of Swiss cheese slices. You want them to be snug but not overwhelmed. Think of it as a flavor hug. Step 4: Sprinkle on the Sauerkraut Now, gently scatter the sauerkraut over the cheese layer. This will add that essential crunch and tang that Reuben lovers adore. Step 5: Swoon Over the Sauce Using a spoon, generously drizzle the creamy sauce over the layered ingredients. Don’t be shy; this is where the magic happens, and flavor intensifies! Step 6: Serve and Enjoy! These bites are best served immediately, while everything is fresh and crunchy. Encourage your guests to dig in, and be prepared for the delightful symphony of flavors that will have them clamoring for more. No matter the occasion, these Crunchy Reuben Pickle Bites for Every Occasion bring flavor, fun, and crunch to the table. Perfect for parties, picnics, or even as a cheeky snack while binge-watching your favorite show, these bites are your new go-to. So, roll up your sleeves, grab those ingredients, and let the flavor festivities begin! This showstopping Crunchy Reuben Pickle Bites for Every Occasion delivers restaurant-quality results using simple ingredients you probably already have at home. The perfect balance of textures and flavors creates an unforgettable dining experience that will have everyone asking for seconds. Picture-perfect presentation with vibrant colors makes this dish absolutely Instagram-worthy and guaranteed to impress any dinner guest. Incredibly versatile recipe that works beautifully for weeknight dinners, meal prep, special occasions, or even outdoor entertaining sessions. Perfecting Crunchy Reuben Pickle Bites for Every Occasion Cooking Process Start by preparing the mayonnaise mixture first to let those flavors meld. While it blends, layer the pickle chips, corned beef, Swiss cheese, and sauerkraut for efficiency. Finally, drizzle the sauce right before serving for the freshest taste. Add Your Touch to Crunchy Reuben Pickle Bites for Every Occasion Feel free to swap out the corned beef for pastrami or add a spicy kick with jalapeños. You can also use different cheeses, such as provolone or pepper jack, for a unique twist on flavor. Storing & Reheating Crunchy Reuben Pickle Bites for Every Occasion Store leftovers in an airtight container in the refrigerator for up to two days. Reheat in the oven at 350°F for about 10 minutes until they become warm and crispy again. Creating these Crunchy Reuben Pickle Bites has become a go-to for me at family gatherings. Watching my cousins devour them in minutes feels like an endless source of joy. FAQs About Crunchy Reuben Pickle Bites for Every Occasion What is Crunchy Reuben Pickle Bites for Every Occasion? Crunchy Reuben Pickle Bites for Every Occasion are delightful appetizers that combine the classic flavors of a Reuben sandwich in a fun, bite-sized format. These tasty morsels feature layers of tangy pickles, savory corned beef, creamy Swiss cheese, and zesty sauerkraut, all drizzled with a flavorful mayonnaise-based sauce. Perfect for gatherings, game days, or casual snacks, these bites bring joy to every table, allowing everyone to enjoy a taste of the beloved Reuben without needing a plate or utensils. How do I serve Crunchy Reuben Pickle Bites for Every Occasion? These Crunchy Reuben Pickle Bites are best served fresh and immediately after assembly
Delicious Buttery Soft Pretzel Bites Recipe You Can Make At Home

Imagine sinking your teeth into a golden-brown, buttery soft pretzel bite that melts in your mouth, bursting with that unmistakable flavor of freshly baked dough. The aroma wafting through your kitchen is so enticing that even your cat might stop ignoring you for just a moment to investigate. This is exactly what you can expect with these irresistible Buttery Soft Pretzel Bites—a delightful snack that’s perfect for sharing (or not) and brings a touch of that classic brewery experience right into your home. Picture this: a game night with friends, laughter echoing around the room, and you serve these warm, fluffy pretzel bites straight from the oven. They practically disappear in seconds, leaving only crumbs and your proud smile behind. The simplest ingredients transform into something magical, pulling everyone together over the joy of sharing food. Get ready for a flavor experience that will make you feel like a master chef, even if you’re still figuring out how to boil water. Ingredients for Buttery Soft Pretzel Bites Here’s what you’ll need to make this delicious Buttery Soft Pretzel Bites: 1.5 cups warm milk or water – Ensure the temperature is between 110 to 115°F to activate the yeast properly. 1 tablespoon brown sugar – This adds a slight sweetness to the dough, making the pretzels even more delicious. 1 (0.25-ounce) package active dry yeast – Vital for leavening and giving those pretzel bites the perfect fluffy texture. 4.5 cups all-purpose flour – This is the base of your dough; feel free to have extra on hand for dusting. 2 tablespoons melted butter – Adds richness to the dough; keep some extra for brushing on top before baking. 1 teaspoon fine sea salt – Essential for flavoring the dough. 9 cups water – This will create a boiling bath for your pretzel bites, essential for that unique pretzel crust. 0.33 cups baking soda – This ingredient creates that iconic flavor and beautiful brown color on your pretzels upon boiling. 1 large egg – Whisked with 1 tablespoon water for egg wash, which gives the pretzels a shiny, golden finish. Pretzel salt or coarse sea salt – For sprinkling on top, providing the perfect finishing touch. How to Make Buttery Soft Pretzel Bites Follow these simple steps to prepare this delicious Buttery Soft Pretzel Bites: Step 1: Prepare the Yeast Mixture In a large bowl, combine warm milk or water with the brown sugar and active dry yeast. Let it sit for about 5 minutes until it becomes foamy and bubbly. This activation period is crucial for your pretzels to rise beautifully. Step 2: Make the Dough Add the flour, melted butter, and fine sea salt to the yeast mixture. Mix until a smooth dough forms, then knead for 5-7 minutes on a floured surface until it’s elastic and soft. Don’t be shy—work those muscles! Step 3: Let It Rise Place the kneaded dough in a greased bowl, cover it with a clean kitchen towel, and let it rise in a warm place until it doubles in size, which should take about an hour. You could also use this time to reflect on your life choices or perfect your pretzel-whirling skills. Step 4: Preheat and Boil While the dough is rising, preheat your oven to 425°F (220°C) and line a baking sheet with parchment paper. In a large pot, bring 9 cups of water and 0.33 cups of baking soda to a boil. This step is crucial for achieving that signature pretzel bite texture. Step 5: Shape the Pretzel Bites Once the dough has risen, divide it into 12 equal pieces. Roll each piece into a rope about 1-inch thick, then cut it into bite-sized pieces. Each piece should look like a tiny, delicious pillow ready for its boiling bath. Step 6: Boil and Bake Gently drop the bite-sized dough into the boiling baking soda water for 30 seconds, then remove them with a slotted spoon. Place the boiled bites on your prepared baking sheet, brush them with the whisked egg, and sprinkle with pretzel salt. Bake for 12-15 minutes or until they are golden brown and make your kitchen smell like a dream. Transfer to plates and enjoy your Buttery Soft Pretzel Bites warm, with your favorite dipping sauces, or straight from the oven, because who can resist? This showstopping Buttery Soft Pretzel Bites delivers restaurant-quality results using simple ingredients you probably already have at home. The perfect balance of textures and flavors creates an unforgettable dining experience that will have everyone asking for seconds. Picture-perfect presentation with vibrant colors makes this dish absolutely Instagram-worthy and guaranteed to impress any dinner guest. Incredibly versatile recipe that works beautifully for weeknight dinners, meal prep, special occasions, or even outdoor entertaining sessions. Perfecting Buttery Soft Pretzel Bites Cooking Process To ensure perfect results, start by activating your yeast in a warm liquid while you measure and prep other ingredients. Knead your dough until smooth, then allow to rise. Boiling the pretzel bites in baking soda water before baking gives them that classic pretzel flavor and texture. Add Your Touch to Buttery Soft Pretzel Bites Feel free to experiment by adding spices like garlic powder or different cheese flavors to the dough. You can also serve these with various dipping sauces, such as cheese sauce, mustard, or even marinara for a fun twist. Storing & Reheating Buttery Soft Pretzel Bites To store, place leftover pretzel bites in an airtight container and refrigerate for up to three days. To reheat, toss them in the oven at 350°F for about 5-7 minutes for that fresh-out-of-the-oven taste. Cooking these buttery delights reminds me of the time I made them for a family gathering. The room filled with warm aromas, and my cousin declared them better than any fair’s pretzel stand—definitely a moment that warms my heart. FAQs About Buttery Soft Pretzel Bites What is Buttery Soft Pretzel Bites? Buttery Soft Pretzel Bites are delightful little morsels that combine the classic flavors of soft pretzels with a
Easy Crispy Fried Mushrooms Recipe for Perfect Snacks or Appetizers

There’s something utterly magical about crispy fried mushrooms, isn’t there? Just picture it: golden-brown exteriors that promise a satisfying crunch and that earthy, umami flavor bursting with every delicious bite. These Easy Crispy Fried Mushrooms will easily steal the spotlight at any gathering, whether you’re hosting a casual Friday night dinner or sophisticated events. If you’re anything like me, you’ve probably had your fair share of deep-fried delights. But imagine the delight when you realize that you can whip up a batch of Easy Crispy Fried Mushrooms right in your kitchen, without any culinary gymnastics! The tantalizing aroma will fill your home, creating an irresistible invitation for friends and family to gather around the table, eager to devour these flavor-packed bites. Ingredients for Easy Crispy Fried Mushrooms Here’s what you’ll need to make this delicious Easy Crispy Fried Mushrooms: 1 ½ lbs white button mushrooms – Choose firm, fresh mushrooms with no blemishes for the best flavor and texture. 1 ¼ cups panko breadcrumbs – These flaky crumbs create an airy, crispy coating that’s perfect for frying. 1 ½ teaspoons Old Bay Seasoning – Adds a delightful, zesty punch that pairs beautifully with the mushrooms. 1 teaspoon marjoram – A subtle herb that complements the mushrooms’ earthy flavors perfectly. ½ teaspoon garlic powder – Pop in this sweet, aromatic ingredient for just the right amount of savory goodness. ½ teaspoon kosher salt – Enhances the overall flavor profile, making everything taste better. ¼ teaspoon fresh ground black pepper – Adds a hint of heat to balance the dish. 1 cup buttermilk – This tangy ingredient helps the coating stick and adds moistness. ½ cup all-purpose flour – Essential for the dredging process, providing a base for your crispy coating. Vegetable oil (for frying) – Use a high-smoke point oil like canola for even frying and great flavor. How to Make Easy Crispy Fried Mushrooms Follow these simple steps to prepare this delicious Easy Crispy Fried Mushrooms: Step 1: Prepare the Mushrooms Start by trimming the stems off the white button mushrooms, ensuring they’re clean and ready for their crispy transformation. Step 2: Set Up the Dipping Stations In one bowl, pour the buttermilk, and in another bowl, whisk together the panko breadcrumbs, Old Bay Seasoning, marjoram, garlic powder, kosher salt, and black pepper until everything is thoroughly mixed. Step 3: Dredge the Mushrooms Take each mushroom, dust it lightly in flour for a good base coating, then plunge it into the buttermilk. Finally, coat the mushroom in the seasoned panko mixture, making sure each one is generously covered for that epic crunch. Step 4: Heat the Oil In a large frying pan, pour enough vegetable oil to cover the bottom by about half an inch. Heat it over medium-high heat until a drop of water sizzles when it hits the oil. Step 5: Fry the Mushrooms Carefully add the mushrooms in batches to the hot oil. Fry them until they are golden brown and crisp, about 3-4 minutes per side, turning them gently with a slotted spoon. Step 6: Drain and Serve Once golden and crispy, remove the mushrooms from the oil and place them on paper towels to drain excess oil. Serve hot with your favorite dipping sauce, and enjoy that incredible crunch! These Easy Crispy Fried Mushrooms make for perfect snacks, party appetizers, or simple meal pairings. I promise, you’ll never want to order takeout or skip the homemade version again! Perfecting Easy Crispy Fried Mushrooms Cooking Process Start by preparing your mushrooms, followed by creating the buttermilk and breadcrumb mixtures. Dredge the mushrooms before heating oil in a pan, ensuring everything is prepped for a smooth cooking experience to achieve that crispy perfection. Add Your Touch to Easy Crispy Fried Mushrooms Feel free to swap the Old Bay seasoning for your favorite spice blend or add some grated Parmesan to the breadcrumb mix for extra flavor. You can also try using different types of mushrooms for a unique twist on this classic recipe. Storing & Reheating Easy Crispy Fried Mushrooms To store, place any leftover mushrooms in an airtight container in the fridge for up to three days. Reheat in a preheated oven at 350°F for about 10 minutes to restore their crispiness. A funny thing happened the last time I made these Easy Crispy Fried Mushrooms. My friends devoured them so quickly that I barely got one! Those crispy little bites somehow brought everyone together, and I learned that calling them “healthy” still doesn’t keep them from disappearing in minutes. FAQs About Easy Crispy Fried Mushrooms What is Easy Crispy Fried Mushrooms? Easy Crispy Fried Mushrooms are delightful bites made from tender white button mushrooms, coated in a flavorful mixture of panko breadcrumbs and seasonings. This delightful snack or appetizer is crispy on the outside and juicy on the inside, making it a favorite for gatherings or a quick treat at home. With a simple preparation method and easily accessible ingredients, these mushrooms provide a delicious alternative to fried snacks, ready in just about 35 minutes. How do I make the coating for Easy Crispy Fried Mushrooms? To create the perfect coating for Easy Crispy Fried Mushrooms, you’ll combine panko breadcrumbs with Old Bay seasoning, marjoram, garlic powder, kosher salt, and black pepper in a bowl. Each mushroom is first dredged in flour, dipped into buttermilk, and then generously coated with the seasoned panko mixture. This three-step process ensures a crunchy and flavorful exterior that perfectly complements the tender mushroom inside. Can I use different types of mushrooms for this recipe? Absolutely! While white button mushrooms are a classic choice, you can experiment with various mushroom varieties for your Easy Crispy Fried Mushrooms. Consider using cremini for a deeper flavor, shiitake for a unique twist, or even portobello for larger bites. Each type will bring its own personality to the dish while maintaining that satisfying crunch you crave. How do I store and reheat Easy Crispy Fried Mushrooms? If you have any leftovers of your
Easy and Delicious Creamy Classic French Onion Dip Recipe
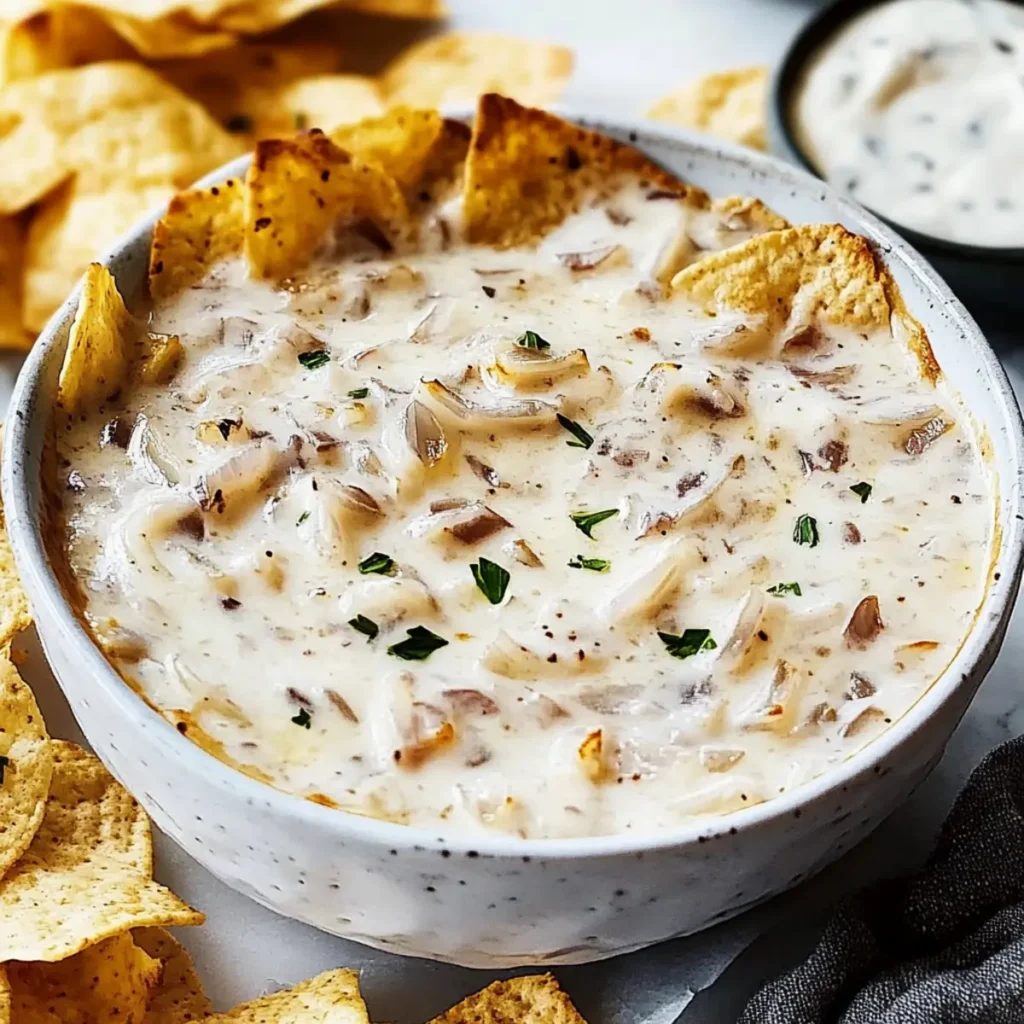
The aroma of caramelized onions wafts through the air, mingling with creamy, rich undertones in the dish that has become a beloved classic. This Creamy Classic French Onion Dip Recipe: Easy and Delicious is the life of the party, the dip that draws friends and family into the kitchen for a taste, leaving everyone clamoring for more. A close friend once shared this treasured recipe with me during a cozy movie night at home. We dipped crunchy chips and fresh veggies into this luscious concoction, creating an instant connection over flavor, laughter, and shared memories. Perfect for any occasion—from casual gatherings to game day feasts—this dip promises to deliver a delightful flavor experience that you will want to savor time and time again. Ingredients for Creamy Classic French Onion Dip Recipe: Easy and Delicious Here’s what you’ll need to make this delicious Creamy Classic French Onion Dip Recipe: Easy and Delicious: 2 tablespoons butter or olive oil – Opt for butter for a classic flavor, or use olive oil for a lighter touch. 2 medium yellow onions, sliced – Choose onions that are firm and heavy for the best flavor. They’ll transform beautifully with a good caramelization. 3 cloves garlic, minced – Fresh garlic adds depth to the dip; make sure it’s minced finely for the best distribution. 2 cups sour cream – This gives the dip its creamy base, contributing to that signature tangy flavor. ¼ cup mayonnaise – A touch of mayo enhances the creaminess and adds a subtle richness to the mix. 2 tablespoons fresh chives, finely chopped – Bright and fresh, chives add a pop of color and a mild onion flavor. 1 tablespoon fresh parsley, finely chopped – Parsley will bring a lovely freshness and balance to the rich ingredients. Kosher salt and freshly ground black pepper (to taste) – Essential for seasoning; adjust to your liking as you mix. Worcestershire sauce (optional) – This adds a layer of umami and depth, but is totally optional if you prefer a simpler taste. How to Make Creamy Classic French Onion Dip Recipe: Easy and Delicious Follow these simple steps to prepare this delicious Creamy Classic French Onion Dip Recipe: Easy and Delicious: Step 1: Caramelize the Onions In a skillet over medium heat, melt the butter or olive oil. Once melted, add the sliced onions. Stir occasionally, allowing the onions to cook down slowly. This process will take about 45 minutes, but trust me, it’s worth it. The key here is patience; the longer they cook, the sweeter and more flavorful they become. Step 2: Add Garlic When the onions are golden brown and caramelized, stir in the minced garlic and cook for an additional minute. This will bloom the garlic’s flavor, making your dip even more irresistible. Step 3: Combine Ingredients In a mixing bowl, combine the caramelized onion and garlic mixture with sour cream, mayonnaise, chives, parsley, salt, and pepper. Stir well until everything is smoothly integrated. The mix will start to look luxuriously creamy and smell divine. Step 4: Season to Taste Taste your creation and adjust seasoning if necessary. You might like to add a dash of Worcestershire sauce at this point for that extra kick; it infuses the dip with a savory richness that is hard to resist. Step 5: Chill or Serve Transfer the dip to a serving bowl and either chill it in the refrigerator for a couple of hours for maximum flavor melding or serve it right away if you’re too excited to wait! Step 6: Pairing Perfectly Serve this dip chilled or at room temperature with an array of crunchy vegetables and crispy chips—it’s a guarantee that everyone will be back for seconds. You can also pair it with pita chips or toasted baguette slices for an elevated touch. This Creamy Classic French Onion Dip Recipe: Easy and Delicious serves as a delightful companion to any gathering. With its stunning visual appeal, mouthwatering flavors, and the engaging process of making it, you’ll find that this dish brings friends and family together and makes any occasion feel special. So grab those chips, kick back, and enjoy this creamy masterpiece. This showstopping Creamy Classic French Onion Dip Recipe: Easy and Delicious delivers restaurant-quality results using simple ingredients you probably already have at home. The perfect balance of textures and flavors creates an unforgettable dining experience that will have everyone asking for seconds. Picture-perfect presentation with vibrant colors makes this dish absolutely Instagram-worthy and guaranteed to impress any dinner guest. Incredibly versatile recipe that works beautifully for weeknight dinners, meal prep, special occasions, or even outdoor entertaining sessions. Perfecting Creamy Classic French Onion Dip Recipe: Easy and Delicious Cooking Process To achieve the best results with the Creamy Classic French Onion Dip Recipe: Easy and Delicious, begin by caramelizing the onions slowly for maximum sweetness. While they cook, prepare the creamy base and gather your herbs for seamless assembly. Add Your Touch to Creamy Classic French Onion Dip Recipe: Easy and Delicious Feel free to customize the Creamy Classic French Onion Dip Recipe: Easy and Delicious by swapping out yellow onions for sweet onions or adding in a splash of hot sauce for a spicy kick. You can also experiment with different herbs like dill or thyme. Storing & Reheating Creamy Classic French Onion Dip Recipe: Easy and Delicious For optimal freshness, store any leftover Creamy Classic French Onion Dip Recipe: Easy and Delicious in an airtight container in the fridge for up to three days. Reheat gently in the microwave or serve cold for a refreshing snack. Having served this dip at a game night, I was blown away by how quickly it vanished! Friends kept asking for the recipe, and that’s how I knew I had created something special. FAQs About Creamy Classic French Onion Dip Recipe: Easy and Delicious What is Creamy Classic French Onion Dip Recipe: Easy and Delicious? Creamy Classic French Onion Dip Recipe: Easy and Delicious is a flavorful dip made primarily from
Delicious Quinoa Honey Feta Sweet Potato Rounds Recipe to Try

The aroma of sweet potatoes roasting in the oven fills the kitchen, blending warmly with the tangy scent of crumbled feta and the sweetness of honey. If you are ready for a taste adventure, this Delicious Quinoa Honey Feta Sweet Potato Rounds Recipe will kick your taste buds into high gear, turning mundane snacking into an extraordinary experience. Each round is a delightful morsel featuring a perfect balance of creamy, sweet, and savory flavors, making it a dish that’s not only perfect for weeknight dinners but also impressively elegant for entertaining guests. Pull up a chair, grab your apron, and get ready for a culinary journey that’s as satisfying to make as it is to devour. Whether you’re hosting a brunch with friends, planning a cozy family dinner, or simply wanting a delicious snack to enjoy while binge-watching your favorite show, these sweet potato rounds won’t just fill your plates; they will elevate your meals to a whole new level. Anticipate crispy edges, tender centers, and a symphony of flavors that dance together in every bite. Ingredients for Delicious Quinoa Honey Feta Sweet Potato Rounds Recipe Here’s what you’ll need to make this delicious Delicious Quinoa Honey Feta Sweet Potato Rounds Recipe: 2 medium sweet potatoes – Look for firm and smooth-skinned potatoes; they should yield slightly to pressure when ripe, indicating sweetness and moisture. 2 tablespoons olive oil – Extra virgin olive oil is ideal for its robust flavor and health benefits. ½ teaspoon salt – Enhances the flavor; feel free to adjust based on your taste preferences. ¼ teaspoon black pepper – A pinch adds warmth without overwhelming the sweet potato’s natural sweetness. 4 ounces feta cheese – Opt for a block of feta for better texture instead of crumbled varieties; it’ll melt beautifully. 2 tablespoons honey – The star of the show adds a delightful sweetness that contrasts beautifully with the salty feta. 1 tablespoon fresh thyme leaves – Fresh thyme elevates the dish with its aromatic flavor. 1 tablespoon balsamic glaze – Adds a tangy, sweet drizzle that complements the other ingredients perfectly. ¼ cup chopped walnuts or pecans – These nuts provide a crunchy finish and nutty flavor that rounds out the dish. How to Make Delicious Quinoa Honey Feta Sweet Potato Rounds Recipe Follow these simple steps to prepare this delicious Delicious Quinoa Honey Feta Sweet Potato Rounds Recipe: Step 1: Preheat Your Oven Start by preheating your oven to 400°F (200°C). The heat will help caramelize those sweet potatoes, creating a depth of flavor and golden-brown edges. Step 2: Prepare the Sweet Potatoes While your oven warms up, peel and slice the sweet potatoes into ½-inch thick rounds. Toss these delightful discs in a bowl with olive oil, salt, and black pepper until they’re well-coated, ensuring every bite is packed with flavor. Step 3: Bake Until Tender Arrange the sweet potato rounds on a baking sheet, making sure they aren’t crowded. Give them space to breathe and crisp up nicely! Bake for about 25 minutes or until you can easily poke them with a fork, flipping them halfway through to promote even browning. Step 4: Top with Feta and Honey Once they are tender and slightly golden, remove them from the oven. Now is the fun part: sprinkle crumbled feta cheese generously over the hot sweet potato rounds. Drizzle honey over them, enticing your kitchen with its sweet aroma, and add thyme if you’re feeling fancy. Step 5: Drizzle with Balsamic Glaze For an extra flavor kick, drizzle the balsamic glaze over the top. This adds a beautiful glossy finish and enhances the dish with its sweet-tangy profile. Step 6: Finish with Nuts Finally, sprinkle the chopped walnuts or pecans on top, giving your dish a crunchy texture that contrasts perfectly with the soft sweet potatoes. Transfer to plates and prepare for an explosion of flavor in your mouth. Indulging in these Delicious Quinoa Honey Feta Sweet Potato Rounds Recipe is more than just enjoying a meal; it’s about celebrating the simple joys of life through food, laughter, and connections with others. Your taste buds and your friends will thank you, and you’ll likely find yourself enjoying these delicious bites again and again. Happy cooking! Perfecting Delicious Quinoa Honey Feta Sweet Potato Rounds Recipe Cooking Process To make your cooking experience a breeze, start by preheating your oven while you slice the sweet potatoes. Toss them in olive oil, salt, and pepper, and while they bake, prepare the toppings. Your kitchen will smell fantastic! Add Your Touch to Delicious Quinoa Honey Feta Sweet Potato Rounds Recipe Feel free to experiment! Swap feta cheese for goat cheese for a tangy twist or add a pinch of smoked paprika for some extra depth. Consider throwing in some cranberries for those sweet bites to balance the flavors perfectly. Storing & Reheating Delicious Quinoa Honey Feta Sweet Potato Rounds Recipe Store any leftovers in an airtight container in the fridge for up to three days. To reheat, pop them in the oven at 350°F until warmed through, preserving that delightful crunch. Sharing a special moment, I remember the time I made these for my best friend’s birthday. Everyone thought I had taken a cooking class because they were so impressed. Turns out, a dash of love and some tasty ingredients worked wonders! FAQs About Delicious Quinoa Honey Feta Sweet Potato Rounds Recipe What is Delicious Quinoa Honey Feta Sweet Potato Rounds Recipe? The Delicious Quinoa Honey Feta Sweet Potato Rounds Recipe is a vibrant and flavorful dish that combines roasted sweet potato rounds topped with creamy feta cheese, a drizzle of honey, and chopped nuts. This dish not only offers a beautiful presentation but also balances sweet and savory elements, making it perfect for various occasions. It’s simple enough for weeknight dinners yet impressive enough for entertaining guests. How can I customize the Delicious Quinoa Honey Feta Sweet Potato Rounds Recipe? You can customize the Delicious Quinoa Honey Feta Sweet Potato Rounds Recipe to fit your
Deliciously Easy Creamy Cilantro Lime Taco Sauce Recipe
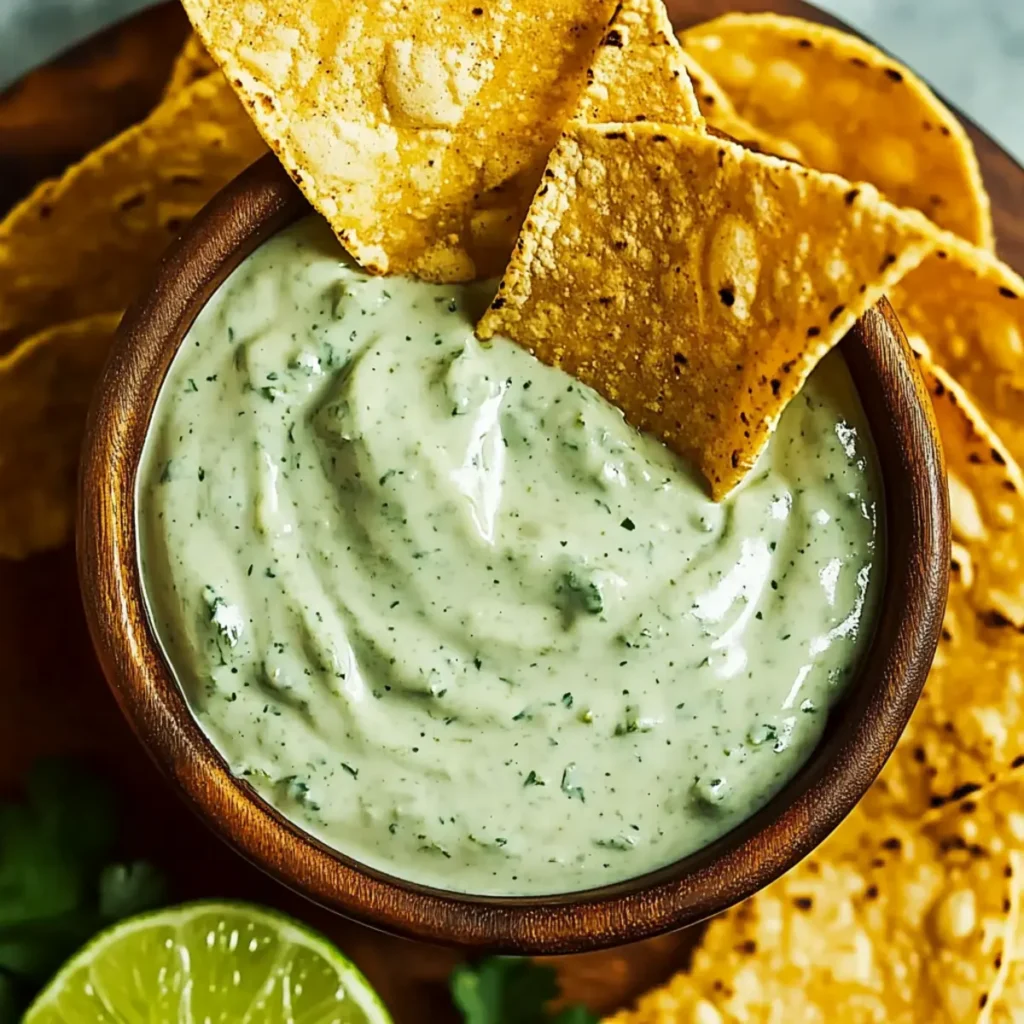
The tangy allure of Creamy Cilantro Lime Taco Sauce is like a joyous fiesta for your taste buds. Imagine a thick, velvety sauce bursting with vibrant flavors that elevate any taco night into a gourmet experience. This delightful concoction is more than just a dip; it’s a game-changer, transforming plain old meals into culinary masterpieces with just a drizzle. Remember that one time when you almost burned the taco shells, but salvaged the night with a dip that could charm anyone? That moment speaks to the power of a stellar sauce. Perfect for gatherings, cozy nights in, or simply when you want to treat yourself, this sauce will become your secret weapon. Get ready for an explosion of flavor that beckons everyone to the table! Ingredients for Creamy Cilantro Lime Taco Sauce Here’s what you’ll need to make this delicious Creamy Cilantro Lime Taco Sauce: 1 cup whole milk Greek yogurt or sour cream – Greek yogurt gives the sauce a tangy depth, while sour cream offers a creamier texture; pick your preference. 2 tablespoons mayonnaise – Just enough to add richness without overpowering the fresh flavors. 1 tablespoon fresh lime juice – Freshly squeezed is key here for that zesty kick! 1 small garlic clove – Fresh garlic strengthens the flavor profile; always a great addition for garlic lovers. ½ teaspoon sea salt – Enhances the overall flavor; feel free to adjust based on your taste buds. ¼ teaspoon onion powder – It adds depth without the hassle of chopping onions. ½ cup fresh cilantro – The star of the show! Fresh cilantro adds brightness and herby goodness, so don’t skimp on it. How to Make Creamy Cilantro Lime Taco Sauce Follow these simple steps to prepare this delicious Creamy Cilantro Lime Taco Sauce: Step 1: Gather Your Ingredients Before you start, round up all your ingredients. It’s like putting together your dream team for taco night. Trust me; the less you have to run around, the smoother the process will be. Step 2: Blend the Base In a food processor, combine the Greek yogurt or sour cream, mayonnaise, lime juice, garlic, sea salt, and onion powder. Pulse it until the mixture achieves a creamy, dreamy consistency that begs for a taco to be dipped! Step 3: Add the Cilantro Now comes the fun part. Toss in the fresh cilantro and pulse a few more times until everything is well integrated, but be careful not to overdo it! You want those lovely green flecks to remain visible like little bursts of happiness in your sauce. Step 4: Taste and Adjust Dip a spoon into your creation and taste it. Is it zesty enough for your liking? Need more salt? Adjust it until it’s perfect for you! This step is essential because who knows better than you what will tickle your palate? Step 5: Chill for the Perfect Consistency Transfer your creamy masterpiece to a serving bowl, cover it, and let it chill in the fridge for about 30 minutes. This allows the flavors to meld beautifully, bringing a whole new dimension to your sauce. Step 6: Serve and Enjoy! When ready, give it a final stir, and drizzle, dollop, or spread your beautiful sauce on tacos, nachos, or even salads. It’s the flavorful finishing touch to make any meal feel like a special occasion. Now that you have your Creamy Cilantro Lime Taco Sauce, be ready to wow your friends or perhaps just indulge solo after a long day! It’s flavorful, easy to make, and goes with just about everything. That’s a win in my book! And just like that, taco night is officially elevated. Enjoy every creamy, zesty bite! Perfecting Creamy Cilantro Lime Taco Sauce Cooking Process To maximize efficiency, start by blending the Greek yogurt, mayo, lime juice, garlic, salt, and onion powder. While that’s blending, get your cilantro ready. This sequencing ensures a smooth and creamy sauce without missing a beat. Add Your Touch to Creamy Cilantro Lime Taco Sauce Feel free to swap Greek yogurt for sour cream for a more tangy flavor. Add diced jalapeños for a kick or season it with smoked paprika for a unique twist. The options are endless, so have fun! Storing & Reheating Creamy Cilantro Lime Taco Sauce Store your sauce in an airtight container in the fridge for up to one week. If you need to reheat, use low heat to maintain its creamy texture, whisking gently to blend any separated elements. Sharing a memorable moment, I remember the first time I served this sauce at a family gathering. Everyone raved about it, and my aunt even cheekily asked for the recipe—mission accomplished! FAQs About Creamy Cilantro Lime Taco Sauce What is Creamy Cilantro Lime Taco Sauce? Creamy Cilantro Lime Taco Sauce is a delightful condiment that adds a burst of flavor to tacos, burritos, and more. This sauce marries the tangy zest of lime with the fresh brightness of cilantro, creating a creamy blend that is both luxurious and light. Made primarily with Greek yogurt or sour cream, mayonnaise, and garlic, this versatile sauce is not only easy to make but also elevates any dish it accompanies. Whether you’re hosting a barbecue or having a casual weeknight dinner, this sauce is sure to impress. How do you make Creamy Cilantro Lime Taco Sauce? Making Creamy Cilantro Lime Taco Sauce is a breeze. Start by combining Greek yogurt (or sour cream), mayonnaise, fresh lime juice, garlic, salt, and onion powder in a food processor. Blend until smooth and creamy. Once the base is ready, add fresh cilantro and pulse just until it’s incorporated, ensuring you still see those vibrant green flecks. This sequence allows for a rich and well-blended sauce perfect for drizzling over your favorite dishes. Can I customize my Creamy Cilantro Lime Taco Sauce? Absolutely! One of the best aspects of Creamy Cilantro Lime Taco Sauce is its versatility. For a spicier kick, consider adding diced jalapeños or a splash of hot sauce. If you