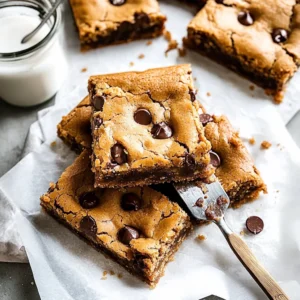

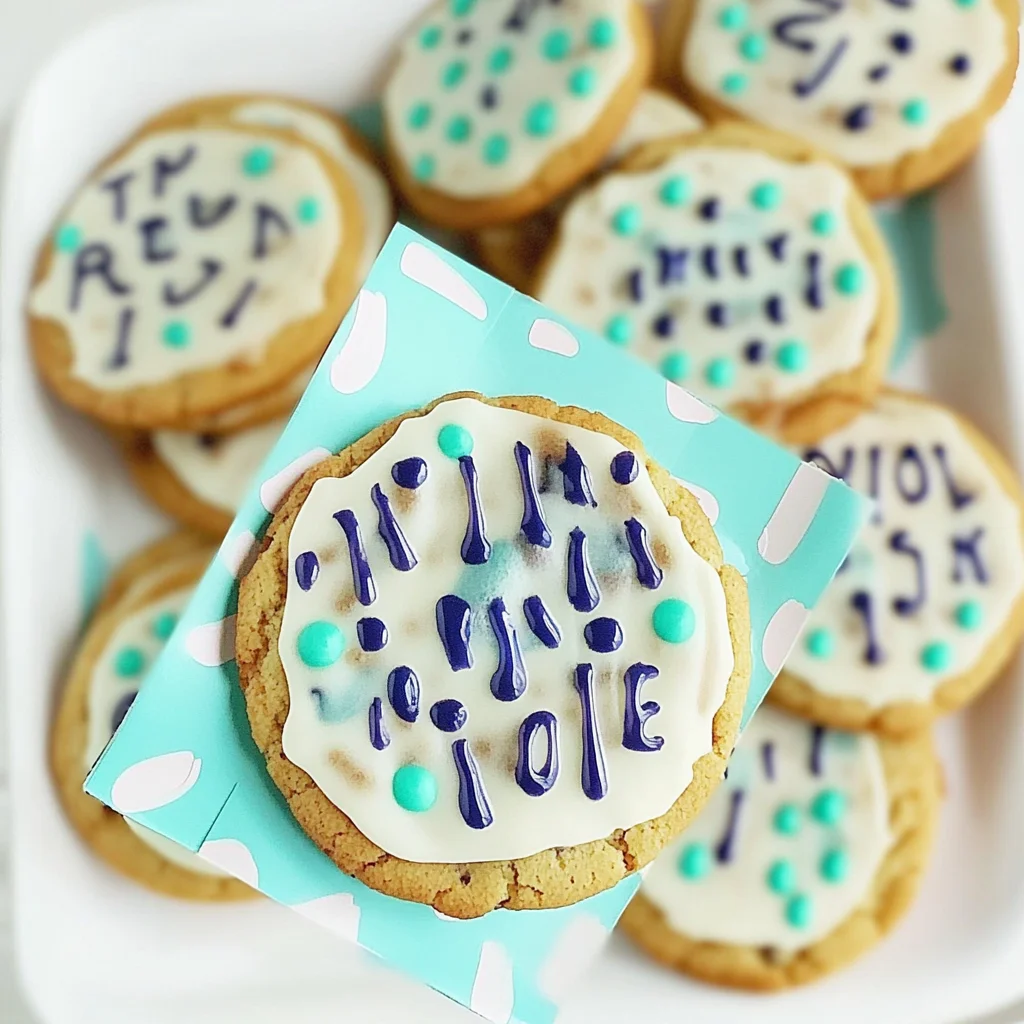
Imagine biting into a warm, chewy cookie that melts in your mouth, bursting with flavors that say “thank you” in the sweetest way possible. These thank you cookies are not just treats; they are little bundles of love that carry the aroma of vanilla and the delightful crunch of chocolate chips, making every moment feel special.
Every time I whip up a batch of these thank you cookies, I’m transported back to my childhood kitchen, where the smell of freshly baked goods signaled joy and connection. Whether it’s a cozy gathering with friends or a heartfelt gesture for a neighbor, these cookies are perfect for any occasion that calls for gratitude, promising an amazing flavor experience that leaves everyone asking for seconds.
Why Will You Keep Making thank you cookies?
Soft and chewy in every bite, these cookies are a delightful way to express gratitude! Simple ingredients like all-purpose flour, unsalted butter, and rich brown sugar come together effortlessly. Loaded with chocolate chips, they offer a perfect balance of sweetness. Versatile add-ins like nuts allow customization for every taste. In just 25 minutes, you can whip up a batch that everyone will love!
thank you cookies Ingredients
For the Dough
- 2 cups all-purpose flour – This forms the base of your cookies, providing the perfect chewy texture.
- 1 teaspoon baking soda – This helps the cookies rise and develop a delightful softness.
- 1 teaspoon salt – A pinch of salt enhances the sweetness, balancing the flavors beautifully.
For the Batter
- 1 cup unsalted butter (softened) – Softened butter ensures a creamy mixture for rich, flavorful cookies.
- 1 cup brown sugar (packed) – Brown sugar adds moisture and a touch of caramel flavor to each bite.
- 1/2 cup granulated sugar – Granulated sugar provides the right amount of sweetness and helps with cookie spread.
- 2 large eggs – Eggs bind everything together while contributing to the cookies’ richness.
- 2 teaspoons vanilla extract – Pure vanilla extract infuses warmth and a lovely aroma into your thank you cookies.
For the Mix-ins
- 1 cup chocolate chips – These sweet morsels melt slightly, creating pockets of chocolatey goodness throughout.
- 1/2 cup chopped nuts (optional) – Nuts add crunch and depth; feel free to skip if you prefer a smoother texture.
How to Make thank you cookies

1. Preheat the oven to 350°F (175°C). This is the perfect temperature to ensure your cookies bake evenly, creating that delightful golden edge while keeping the centers soft and chewy.
2. Whisk together 2 cups of all-purpose flour, 1 teaspoon of baking soda, and 1 teaspoon of salt in a mixing bowl. This blend provides the foundation for your cookies, ensuring they rise beautifully.
3. Cream together 1 cup of softened unsalted butter, 1 cup of packed brown sugar, and 1/2 cup of granulated sugar in another bowl until smooth. This process adds air into the mixture, resulting in tender cookies.
4. Beat in 2 large eggs one at a time, then stir in 2 teaspoons of vanilla extract. The eggs add moisture and richness while the vanilla infuses a warm aroma that will fill your kitchen.
5. Blend gradually the dry ingredients into the wet mixture until just combined. Be careful not to overmix; this helps maintain that desirable chewy texture in your thank you cookies.
6. Fold in 1 cup of chocolate chips and 1/2 cup of chopped nuts if using. These add-ins bring delightful bursts of flavor and crunch to every bite!
7. Drop rounded tablespoons of dough onto a baking sheet lined with parchment paper. Make sure to leave space between each cookie as they will spread while baking.
8. Bake for 10-12 minutes or until the edges are golden brown. Keep an eye on them; you want that lovely color without overbaking!
9. Cool cookies on the baking sheet for a few minutes before transferring them to a wire rack. This helps them firm up while still warm—perfectly soft and chewy!
Optional: Enjoy them warm with a glass of milk for an extra special treat!
Exact quantities are listed in the recipe card below.
Tips for the Best thank you cookies
- Measure Flour Accurately: Use the spoon-and-level method to avoid too much flour, which can lead to dry cookies.
- Butter Temperature Matters: Ensure your butter is softened, not melted. This creates a creamy mixture that helps the cookies spread perfectly.
- Don’t Overmix Dough: After adding dry ingredients, mix just until combined. Overmixing can result in tough cookies instead of soft and chewy thank you cookies.
- Chill Dough for Texture: For an even chewier cookie, chill the dough for 30 minutes before baking. This step enhances flavor and texture.
- Watch Baking Time: Keep an eye on your cookies; they should be golden around the edges but still soft in the center when you take them out.
- Cool Properly: Allow cookies to cool on the baking sheet for a few minutes before transferring them to a wire rack, preventing breakage.
How to Store and Freeze thank you cookies
- Room Temperature: Store your thank you cookies in an airtight container for up to 3 days to keep them soft and chewy.
- Fridge: If you want to extend their freshness, place the cookies in the fridge for up to a week. Ensure they are well-wrapped to avoid drying out.
- Freezer: For longer storage, freeze your thank you cookies in a freezer-safe bag for up to 3 months. Thaw at room temperature before enjoying.
- Reheating: To revive their original texture, microwave the cookies for about 10-15 seconds or warm them in a preheated oven at 350°F for 5 minutes.
thank you cookies Your Way
Feel free to make these delightful treats your own with these fun twists and swaps that will elevate your baking experience!
- Gluten-Free: Substitute the all-purpose flour with a 1:1 gluten-free blend for a deliciously soft cookie. You won’t miss the traditional flour at all!
- Nut-Free: Omit the chopped nuts or replace them with additional chocolate chips for a richer, sweeter bite. This variation keeps the cookies chewy and kid-friendly.
- Dark Chocolate: Use dark chocolate chips instead of semi-sweet for a deeper, more decadent flavor. The richness of dark chocolate pairs beautifully with the sweetness of brown sugar.
- Oatmeal Boost: Add 1 cup of old-fashioned oats to the dough for extra texture and heartiness. These cookies will have a lovely chewy bite, perfect for any occasion.
- Spiced Up: Mix in 1 teaspoon of cinnamon or nutmeg to add warmth and depth to each cookie. This twist brings a cozy aroma that will fill your kitchen with love.
- Coconut Delight: Fold in 1/2 cup of shredded coconut for a tropical flair. The coconut adds chewiness and fun, making every bite feel like a mini vacation.
- Peanut Butter Swirl: Incorporate 1/2 cup of creamy peanut butter into the wet ingredients for a nutty richness. These cookies become an indulgent treat that’s hard to resist!
Make Ahead Options

Preparing thank you cookies is a delightful way to streamline your baking efforts while ensuring that you always have a sweet treat on hand for those special moments. You can easily prep the dry ingredients—2 cups of all-purpose flour, 1 teaspoon of baking soda, and 1 teaspoon of salt—up to 3 days in advance. For the wet ingredients, you can cream together 1 cup of softened unsalted butter, 1 cup of packed brown sugar, and 1/2 cup of granulated sugar a day ahead as well. Simply store them in an airtight container in the fridge. When you’re ready to bake, just follow the steps for preparing the dough by combining your prepped dry and wet ingredients, folding in 1 cup of chocolate chips and optional 1/2 cup of chopped nuts. Bake as directed and enjoy fresh thank you cookies within just 12 minutes! Transitioning from meal prep to serving has never been easier or more rewarding!
thank you cookies Recipe FAQs
What type of flour should I use for the thank you cookies?
For these delightful thank you cookies, all-purpose flour is your best bet. It provides the perfect balance of structure and tenderness, ensuring each cookie comes out soft and chewy. If you want to experiment, you can try a 50/50 blend of all-purpose and whole wheat flour for a nuttier flavor!
Can I substitute the unsalted butter with something else?
Absolutely! If you’re in a pinch, you can use margarine or even coconut oil as a substitute for unsalted butter. Just remember that using salted butter will add extra saltiness, so reduce or omit the teaspoon of salt in the recipe if you do.
How should I store my thank you cookies?
To keep your cookies fresh and chewy, store them in an airtight container at room temperature. They’ll stay delicious for about 3-5 days. If you’re feeling generous (or just want to save some for later), placing parchment paper between layers of cookies will help prevent sticking.
Can I freeze the cookie dough for later use?
Yes! Freezing the cookie dough is a fantastic option if you’re looking to enjoy freshly baked cookies over time. Simply scoop the rounded tablespoons of dough onto a baking sheet and freeze until solid. Then transfer them to a freezer bag or container and they can be stored for up to 3 months. When you’re ready to bake, just add an extra minute or two to the baking time.
What if my cookie dough is too dry?
If your cookie dough feels crumbly or too dry, it might be due to over-measuring the flour. Try adding a tablespoon of milk or water at a time until the dough comes together nicely. Remember, it should be soft but not sticky!
How many servings does this recipe yield?
This recipe makes about 4 servings, with each serving containing approximately 200 calories. Depending on how big you make your cookie scoops, you’ll likely get around 16-20 delightful cookies perfect for sharing—or keeping all to yourself!